Search This Blog

Sunday, February 27, 2011

Replacing torn window screen in metal frame


A torn screen in your window can start to become a problem when you have mosquitoes or insects start to invade your home. The easiest way to fix the problem is to remove the damaged screen and replace it with a new screen. Before you begin you need to make sure you have the following materials and tools.

Tools & Materials Needed:
Spline Tool
Screen
Needle nose pliers
Flat Head
Utility Knife
Scissors

The first step you must do is remove the screen from the window unit so you can work on it on a flat surface. It is important to carefully remove the screen so you don't damage the screen framing.
Next place the screen on a flat solid surface so you can work on the screen without damaging it, make sure that the screen spline is facing up so you can remove it carefully. Use a flat head screwdriver or a pair of needle nose pliers to remove the twine from the framing. 

Spline Face UpRemove spline using screwdriver

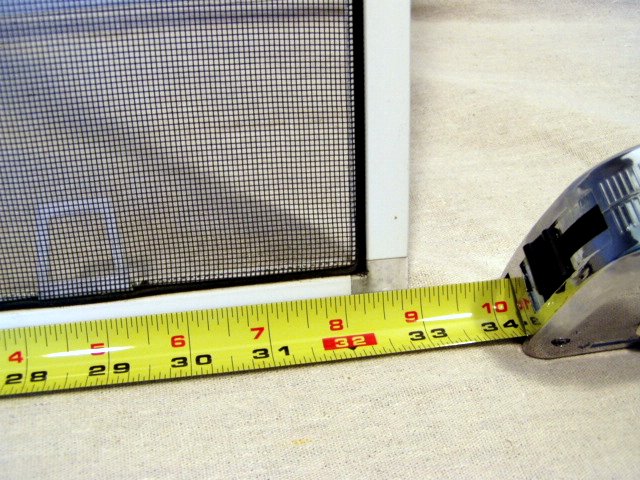
After you have completely removed all the spline from the frame you can easily remove the damaged screening. Cut a new piece of screen to the outside edges of the framing that you are working on. It is better to cut a little big than a little short, you can always trim excess screen. Make sure that the new screen is aligned over the frame.

Cut the screen to the outside edge of the frame
Once you have the screen cut to size use the spline tool to carefully begin to insert the spline into the channel in the frame. It is important to be gentle when using the spline tool because you may accidentally cut the screen if you are not careful. Start with the top of the screen first and then do one of the sides. Once you have the top and one side done it is important to pull the screen snug before you complete the bottom and remaining side. If you feel that there is a little slack in the screen, it should tighten up as you complete the bottom and the side.

Use the spline tool to insert spline into the frame

The last and final step is to carefully trim off any excess screen that remains along the edge of the channel. Be careful not to cut the new screen!

Cut the excess screen with a utility knife

Now that you have your new screen installed it is time to put it back were you got it, carefully place the new screen back into the window were you removed it and you just learned how to replace a damaged screen. Stay tuned for more helpful handy man tricks! See you soon.

Take a look at the video below it shows everthing I just explained above.

Sunday, February 13, 2011

Patching a Hole in Drywall

When you have a hole in your drywall and can't just cover it up with a picture the next best thing is to fix it. Depending on the size of the hole determines what you need to do to fix it. For small holes like nail holes you can simply fill them with drywall spackling, if your hole is smaller than two inches square you are able to cover the hole with fiberglass self adhesive joint tape and fill it with spackling. Now comes the hard part, what do you do with holes that are two big to fill? Below is a detailed description for each scenario.

Materials Needed:
Drywall (usually 1/2" thick on most homes)
1 1/4" Drywall Screws
Self Adhesive Thin Fiberglass Joint Tape
Spackling
Medium and Fine Grit Sandpaper

Tools Needed:
Spackling Knife
Measuring Tape
Utlity knife or drywall saw
Wood Saw
Drill

Holes that are smaller than 10" square:

The first step to do is to cut a square around the perimeter of the existing hole, make sure that no electrical wires are running behind the drywall. I always use a utility knife and make the length of the blade long enough to only cut through the drywall.
The second step you need to do is cut two pieces of wood that are about 3 inches wider than the hole so you can use it as a back support for the new piece of drywall, I always attach the wood at the top and bottom of the hole unless its to wide so you need to attach them at the left and right side. You can use any scrap wood you have laying around as long as it fits behind the drywall, I've even used the wood paint mixers they give you at the local store just grab a few extras if you're doing a patch repair.


The third step is to measure the dimensions of the hole and to cut a piece of drywall the size that you measured. Once you have the piece cut to size, just pop it right into the hole and screw it to the back support you just installed. Don't get to close with the screws to the edge of the drywall because it can crack the drywall easily.


The last and final step is to apply a thin layer of spackling compound to fill any cracks between the existing and new piece of drywall, then you apply the thin joint tape to all the edges and go over it again with the spackling compound. You want to make sure that you cover the tape entirely and I always taped out away from the hole so it makes it easier when sanding. Make sure not to glob it on because this will cause you more work when it comes time to sand. Use the medium grit sand paper to start and finish with the fine grit sand paper. It may take up to three applications to completely cover the tape and make it look smooth; let the spackling dry between each application.


For Holes Larger than 10" Square:

The only step that changes if you are covering holes larger than 10" square is step one. You must cut the existing hole large enough to reach from stud to stud behind the wall. Then you can install the back support in between the wood studs as shown below.

Repeat the steps starting from step three and you can successfully repair a hole in your drywall. I hope you learned something and feel free to leave any comments and questions.

Sunday, February 6, 2011

Replacing Toilet Bowl Wax Ring

Does you bathroom sometimes have a funny smell in it? You might have to replace your wax ring. Your wax ring is located under your toilet bowl and is meant to prevent water, smells, and gases from coming up from your underground septic tank and plumbing and into your lovely bathroom. You must remove your toilet bowl to get to the wax ring, before you remove your toilet seat make sure to shut off all the water and disconnect the water feed to the toilet. You need to flush your toilet once the water is disconnected to be able to clear the toilet of any water.

Once you removed the toilet carefully place it to the side and clean off any existing wax residue that is left from the previous wax ring. Make sure you remove all the old wax from the bottom of the toilet and from the plumbing pipe in the floor. You can purchase a wax ring at your local hardware store for about $5. I recommend buying the wax ring that is made for industrial/ commercial use, they carry a higher percentage of wax and cost about the same as smaller household ones. Once you have the old wax removed simply place the new wax ring on the bottom of the toilet and carefully place it back into its place, you may have to push it down to have it sit firmly in place. Tighten the nuts that hold the toilet in place and replace your water line and turn your water on, you are ready to enjoy your bathroom without those horrible smells!

How to Replace an Electrical Breaker

When working with electricity it is very important to understand that electricity can kill you. The first and most important step when deciding to change an electrical breaker that keeps tripping off is to be absolutely sure that the main power on the breaker box is turned off. Most homes have their main breaker box in the garage, but some condominiums or apartments have a breaker box in the condo/ apartment but the main shut off switch will be in an electrical room usually on the side of the entire apartment/ condo building and each unit will be labeled (make sure not to shut off your neighbors electricity).

Once you have located your main breaker switch shut it to the off position, you must then remove the screws that hold the cover to the breaker box. I always use a voltage meter to double check that the electricity is completely shut off although I shut off the main. Remove the screws that hold the wires to the breaker and make sure you know which one goes where (usually black on top and white on bottom), next simply pry off the damaged breaker and replace it with the new one, it is important to make sure you replace the breaker with the same type of breaker (amps, volts, and clamps on back). Do not turn your main switch back on until you have installed the new breaker and replaced the wires you removed.