Search This Blog

Monday, April 25, 2011

Replacing Cracked Tile


Replacing a cracked tile is a lot easier than you may think and could make your home look beautiful again. With just a few steps you can have that cracked tile looking new again.


Tools Needed
1) Chisel or Flat head screwdriver
2) Hammer
3) Trowel
4) Grout sponge

Materials Needed
1) Replacement tile
2) Mastic (tile adhesive)
3) Grout
4) Tile

The first step that you must do is carefully start chiseling out the damaged tile by starting at the grout line and working your way towards the center. The tile should come out easily with a few taps around the edges.

After you removed the damaged tile it is time to remove the adhesive that holds the tile in place. It is important to make sure that you have a flat surface for your new tile to be able to lay flush. 


Once you have removed all the adhesive it is time to lay the mastic out on the cleaned surface and simply lay your tile into place. Make sure that your grout lines even on all sides, you can use the tile spacers if you have some extras laying around.


Allow the new tile to dry for 24 hours and then fill the grout lines with matching grout. Use the grout sponge to clean the tile and waalaa!!!! That's how you easily replace a damaged tile. See you next time.


Sunday, April 17, 2011

Replacing Rollers on Sliding Glass Door

Anyone that has a sliding glass door knows how horrible it can be if the door stops sliding and you have to practically pry it open because the rollers are shot. Although you may believe that the door itself is broken it is simply the set of rollers on the bottom track that need to be replaced. Below I am going to show you the easiest way to replace the damaged rollers.

Tools Needed
1) Screwdriver
2) Needle Nose Pliers

Materials Needed
1) Replacement Rollers

The first step that you must do is remove the sliding glass door from the track by firmly holding on to each side of the slider and lifting the glass door up and sliding the bottom out of the track. I recommend you having someone help lifting the door out of the track because it is heavy. It is possible to use the suction grips to grab onto the glass but if you hold onto the actual track it makes it a little easier.


Next lay the slider on its side and remove the bottom frame by unscrewing the one screw on each side of the frame that holds the framing together. 


Now you have to carefully remove the actual frame by pulling it away from the slider.


Once you got to bottom frame out you can simply remove the roller from the frame and take to the roller with me to the local hardware store and match the damaged roller with the correct model. They make quite a bit of different types of rollers so you want to make sure that it matches exactly the one you have.

Once you have the correct roller simply repeat the above steps backwards and reinstall the new rollers and place you door back on the track. You just replaced your damaged rollers! Good luck ask me any questions you may have.

Sunday, April 10, 2011

Replacing a Toilet Fill Valve

If your toilet is starts sounding like a tug boat when it is filling the water holding tank you have to replace to "toilet fill valve". Replacing the fill valve will eliminate the loud sounds the toilet makes when it is filling and ensure a peaceful toilet experience. I recommend going to your local hardware store and purchasing a universal fill valve from the plumbing section, you are able to adjust a universal fill valve to fit your specific toilet. Below is a picture of the fill valve.


Tools Needed
Wrench


Supplies Needed
Replacement Universal Fill Valve

The first step to replace the toilet fill valve is to turn off the water supply line to the toilet and flush the toilet so the holding tank empties. Remove the supply line from the fill valve and use the wrench to remove the nut that holds the fill valve in place, it is located under the holding tank as seen on the diagram below.


Disconnect the refill tube from the overflow tube and remove the damaged fill valve from the holding tank. Install the new universal fill valve and make that the nut and the supply line are tightened; they usually make the nut that holds the fill valve plastic to prevent you from breaking the tank. You just successfully replaced your fill valve, enjoy endless flushes with quiet refills. Please enjoy the sounds below.

Sunday, March 27, 2011

Replacing Electrical Outlet

Replacing your electrical outlet on your own can save you about $40 you would pay an electrician to come out to the house to do it for you. You really don't need to know much about electrical work to just replace an existing outlet, you just have to make sure you follow the simple directions below and always make sure your main breaker is turned off before you begin working.

Materials Needed
1) Replacement outlet (Match existing)

Tools Needed
1) Flat head Screwdriver
2) Voltage Tester

The first step you need to do is make sure that you turn off the breaker that powers the outlet that you are changing. Once your power is turned off make sure to check the outlet you will be replacing with the voltage tester to make sure that there is no electricity coming in.


Remove the face plate of the wall outlet.


Remove the two screws that hold the actual outlet in place and pull the damaged outlet out.


Once the outlet is out I always double check to see that the wires are not live by checking with the voltage tester at the contact points on the outlet. (Better safe than sorry)

The next step if pretty much taking one off at a time and placing it on the same location except on the new outlet. The hot wire is usually black or red and will be connected to the side that has the shorter slot on the outlet, and the neutral wire which is white will be connected to the side where the slot that is bigger. The ground wire which is usually green or bare copper will be grounded to the outlet casing which has a green screw indicating the ground.
   

Now that you replaced the outlet you simply screw the new outlet back into place and attach the cover and turn your breaker back on. You have successfully replaced your damaged wall outlet. See you soon!

Sunday, March 20, 2011

Regrouting Shower

Regrouting you shower tile can be an easy job if using the correct tools. It is important to invest into a dremel or borrow one from a friend to be able to effectively regrout you shower tiles.

Tools Needed1) Dremel
2) Grout removal bit
3) Shop Vac
4) Protective Eye wear
5) Grout Sponge
6) 5 Gallon Bucket
7) Wiping rags
8) Grout Spreader

Materials Needed1) Grout
2) Grout Sealer

The first step to regrouting your shower tiles is to score the existing grout lines to at least a 1/16" deep. The best way I have found to do this is to use a dremel with a grout removal bit that you can purchase at your local hardware store. It is important to use the grout removal bit because they are specifically made to be used on grout. Depending on the thickness of the grout lines will determine the grout bit size you will need, they come in sizes from 1/16" to about a 1/4" thick.

I find it easier to start the dremel off at a lower speed until you get comfortable with the way you handle the dremel and then simply up the speed. It is important to be patient and take your time until you get a good technique to passing the dremel through the grout lines. I usually start from the top and work each line from top to bottom and work one line at a time. Once I have completed the vertical lines i move on to the horizontal lines and work those one by one also. It is important not to miss any lines because you have to score each line at least 1/16" deep so the new grout will stick.

The second step once you have removed all the grout is to clean up the mess you made with a vacuum and wipe down the entire area you were working on. Once everything is cleaned you can begin to spread the grout into the scored joints using a grout spreader. Try to not leave excess grout on the tiles it makes it harder to wipe up once you are ready for clean up.


Once you have spread all the grout into the scored grout lines it is time to wipe off all the excess grout off the tiles with a grout sponge. Make sure the grout sponge is not soaking wet because you will take the grout out of the joints you just filled.


Once you remove the excess grout from the tiles you can let the new grout dry for at least 24 hours and you can come back and seal the new grout. I usually use a grout sealer that will not penetrate the tile so you can simply spray grout joints, let it sit for about 5 minutes and wipe off the excess. You usually have to let your sealer dry for about 24 before being able to use the shower. I hope you enjoyed learning how to regrout your shower.

Sunday, March 6, 2011

Replacing Above Stove Microwave

Replacing a microwave above that is attached to the cabinet above you stove is a very easy job to complete with the help of another person and can save you about a $80 installation fee. You will simply need a screwdriver and the help of a friend.

Step 1
First unplug the microwave and have a friend hold the microwave that is in place while you remove the top two screws that are located in the cabinet directly above the microwave.


Step 2
Once you have removed the two screws in the cabinet above the microwave your friend can slowly allow the microwave to come down, it is attached to a bracket behind it that allows the front of the microwave to pivot down and then you are able to lift it up out of the bracket once you have enough clearance. Place the microwave to the side. The picture below shows the mounting bracket that holds the microwave in place.


Step 3
Remove the existing mounting bracket and make sure that the new mounting bracket is installed to the height and specifications that your specific brand microwave is calling for; different companies have different types of mounting brackets. Once you have installed the new mounting bracket, you and a friend can lift the microwave into the bracket and screw the top two screws back into place. The top two screws are usually placed in the same area on the top of all microwaves so you do not need to drill new holes for the new microwave. Make sure the screws are tight and plug in your microwave and you are ready to go.

Sunday, February 27, 2011

Replacing torn window screen in metal frame


A torn screen in your window can start to become a problem when you have mosquitoes or insects start to invade your home. The easiest way to fix the problem is to remove the damaged screen and replace it with a new screen. Before you begin you need to make sure you have the following materials and tools.

Tools & Materials Needed:
Spline Tool
Screen
Needle nose pliers
Flat Head
Utility Knife
Scissors

The first step you must do is remove the screen from the window unit so you can work on it on a flat surface. It is important to carefully remove the screen so you don't damage the screen framing.
Next place the screen on a flat solid surface so you can work on the screen without damaging it, make sure that the screen spline is facing up so you can remove it carefully. Use a flat head screwdriver or a pair of needle nose pliers to remove the twine from the framing. 

Spline Face UpRemove spline using screwdriver

After you have completely removed all the spline from the frame you can easily remove the damaged screening. Cut a new piece of screen to the outside edges of the framing that you are working on. It is better to cut a little big than a little short, you can always trim excess screen. Make sure that the new screen is aligned over the frame.

Cut the screen to the outside edge of the frame
Once you have the screen cut to size use the spline tool to carefully begin to insert the spline into the channel in the frame. It is important to be gentle when using the spline tool because you may accidentally cut the screen if you are not careful. Start with the top of the screen first and then do one of the sides. Once you have the top and one side done it is important to pull the screen snug before you complete the bottom and remaining side. If you feel that there is a little slack in the screen, it should tighten up as you complete the bottom and the side.

Use the spline tool to insert spline into the frame

The last and final step is to carefully trim off any excess screen that remains along the edge of the channel. Be careful not to cut the new screen!

Cut the excess screen with a utility knife

Now that you have your new screen installed it is time to put it back were you got it, carefully place the new screen back into the window were you removed it and you just learned how to replace a damaged screen. Stay tuned for more helpful handy man tricks! See you soon.

Take a look at the video below it shows everthing I just explained above.

Sunday, February 13, 2011

Patching a Hole in Drywall

When you have a hole in your drywall and can't just cover it up with a picture the next best thing is to fix it. Depending on the size of the hole determines what you need to do to fix it. For small holes like nail holes you can simply fill them with drywall spackling, if your hole is smaller than two inches square you are able to cover the hole with fiberglass self adhesive joint tape and fill it with spackling. Now comes the hard part, what do you do with holes that are two big to fill? Below is a detailed description for each scenario.

Materials Needed:
Drywall (usually 1/2" thick on most homes)
1 1/4" Drywall Screws
Self Adhesive Thin Fiberglass Joint Tape
Spackling
Medium and Fine Grit Sandpaper

Tools Needed:
Spackling Knife
Measuring Tape
Utlity knife or drywall saw
Wood Saw
Drill

Holes that are smaller than 10" square:

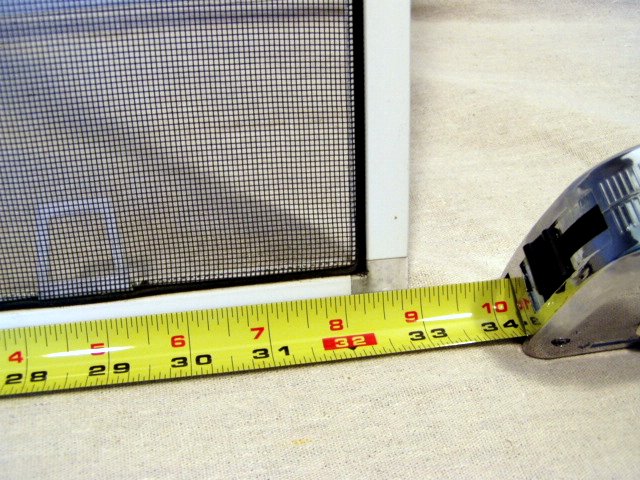
The first step to do is to cut a square around the perimeter of the existing hole, make sure that no electrical wires are running behind the drywall. I always use a utility knife and make the length of the blade long enough to only cut through the drywall.
The second step you need to do is cut two pieces of wood that are about 3 inches wider than the hole so you can use it as a back support for the new piece of drywall, I always attach the wood at the top and bottom of the hole unless its to wide so you need to attach them at the left and right side. You can use any scrap wood you have laying around as long as it fits behind the drywall, I've even used the wood paint mixers they give you at the local store just grab a few extras if you're doing a patch repair.


The third step is to measure the dimensions of the hole and to cut a piece of drywall the size that you measured. Once you have the piece cut to size, just pop it right into the hole and screw it to the back support you just installed. Don't get to close with the screws to the edge of the drywall because it can crack the drywall easily.


The last and final step is to apply a thin layer of spackling compound to fill any cracks between the existing and new piece of drywall, then you apply the thin joint tape to all the edges and go over it again with the spackling compound. You want to make sure that you cover the tape entirely and I always taped out away from the hole so it makes it easier when sanding. Make sure not to glob it on because this will cause you more work when it comes time to sand. Use the medium grit sand paper to start and finish with the fine grit sand paper. It may take up to three applications to completely cover the tape and make it look smooth; let the spackling dry between each application.


For Holes Larger than 10" Square:

The only step that changes if you are covering holes larger than 10" square is step one. You must cut the existing hole large enough to reach from stud to stud behind the wall. Then you can install the back support in between the wood studs as shown below.

Repeat the steps starting from step three and you can successfully repair a hole in your drywall. I hope you learned something and feel free to leave any comments and questions.

Sunday, February 6, 2011

Replacing Toilet Bowl Wax Ring

Does you bathroom sometimes have a funny smell in it? You might have to replace your wax ring. Your wax ring is located under your toilet bowl and is meant to prevent water, smells, and gases from coming up from your underground septic tank and plumbing and into your lovely bathroom. You must remove your toilet bowl to get to the wax ring, before you remove your toilet seat make sure to shut off all the water and disconnect the water feed to the toilet. You need to flush your toilet once the water is disconnected to be able to clear the toilet of any water.

Once you removed the toilet carefully place it to the side and clean off any existing wax residue that is left from the previous wax ring. Make sure you remove all the old wax from the bottom of the toilet and from the plumbing pipe in the floor. You can purchase a wax ring at your local hardware store for about $5. I recommend buying the wax ring that is made for industrial/ commercial use, they carry a higher percentage of wax and cost about the same as smaller household ones. Once you have the old wax removed simply place the new wax ring on the bottom of the toilet and carefully place it back into its place, you may have to push it down to have it sit firmly in place. Tighten the nuts that hold the toilet in place and replace your water line and turn your water on, you are ready to enjoy your bathroom without those horrible smells!

How to Replace an Electrical Breaker

When working with electricity it is very important to understand that electricity can kill you. The first and most important step when deciding to change an electrical breaker that keeps tripping off is to be absolutely sure that the main power on the breaker box is turned off. Most homes have their main breaker box in the garage, but some condominiums or apartments have a breaker box in the condo/ apartment but the main shut off switch will be in an electrical room usually on the side of the entire apartment/ condo building and each unit will be labeled (make sure not to shut off your neighbors electricity).

Once you have located your main breaker switch shut it to the off position, you must then remove the screws that hold the cover to the breaker box. I always use a voltage meter to double check that the electricity is completely shut off although I shut off the main. Remove the screws that hold the wires to the breaker and make sure you know which one goes where (usually black on top and white on bottom), next simply pry off the damaged breaker and replace it with the new one, it is important to make sure you replace the breaker with the same type of breaker (amps, volts, and clamps on back). Do not turn your main switch back on until you have installed the new breaker and replaced the wires you removed.

Sunday, January 30, 2011

Replacing Bathroom Sink Faucet

Replacing the faucet in the bathroom is an easy way to update your bathroom without spending a fortune. Maybe you have to replace the faucet because you have a slow leak and the valve won't shut off completely.
The first step you must do is shut the water valves off under the sink that supplies the hot and cold water to your faucet. Once you shut the water off under the sink you must disconnect the supply line that feeds the water to your faucet, on the new models there is usually a threaded connection at the supply line and the faucet it self and in this case you only have to remove the connection at the faucet and replace the faucet itself. To remove the faucet itself there are nuts that hold the hot and cold water handles in place, use a wrench to remove the nuts (if they are in a hard to reach area and you can't get a typical wrench in there you may have to purchase a basin wrench from your local hardware store, see picture below)


To make it easier for you, I recommend removing the existing faucet and bringing it with you when you purchase the new faucet to make sure that the hot and cold water pipes on the old faucet match with the new one you will purchase. Some of the faucets have a different distance between the hot and cold water pipes.

On some of the older models you will have a direct connection to the faucet and a threaded connection at the water supply; in this case you will remove the connection at the water supply and have to buy supply lines that are long enough to go from the water supply to your new faucet. I recommend using the stainless steel supply lines they come in sizes from 12" and up (see picture below).

 Watts LFSP16-88CP "Stainless Steel" Faucet Supply Line 1/2"x16" (Pack of 5)
Once you purchased all the needed materials all you have to do is connect the supply lines to your water supply valve and install the faucet the same way you uninstalled it and connect the supply line to your faucet and you have completed the task of replacing your bathroom sink faucet. Keep me posted with any questions and good luck with your project.

Saturday, January 29, 2011

Pressure Cleaning Painted Pool Deck

Pressure washing a painted pool deck can be fun and easy as long as you do it the right way and don't use to powerful of a machine. It is one of the cheapest and easiest ways to turn an existing floor that has mold, mildew, dirt or just filth that has accumulated throughout the years into a nice floor that you will get complemented on as soon as others see the miraculous (but inexpensive) change. If you are looking to use the pressure washer to wash you painted pool deck or even siding on your house I recommend you go to your local Home Depot, Lowe’s, or even Wal-Mart and take a look at a pressure washer that is between 1600 to 2000 PSI (aprox. $135.00 - $225.00). They sell gas and electric pressure washers, I prefer the gas pressure washer because you don't have the extra cords that plug into the electrical outlet (they tend to get tangled and cause a hassle) and to be honest I don't like playing with water and electricity at the same time. They do make pressure washers that are much more powerful for commercial use or heavy duty use but you will not need one so strong if you are just working around the house. I have had a customer tell me they bought a 6,000 PSI pressure washer and ended up peeling paint off their patio floor and it cost them more money in the long run.

Once you have your pressure washer and you are ready to clean the painted patio floor it is important that you test the strength of the pressure washer in one of the filthier areas to see how much pressure you need. To adjust the strength of the pressure washer there is a nozzle at the front of the wand where the water comes out of and you can twist it to make a jet stream of water which is the most powerful or you can twist the nozzle the other way to for more of a fan spray that is less powerful, the wider the spray becomes the less pressure you are using. You want enough pressure to clean the surface but not peel any paint, the wider the stream of water the more area you will cover with each pass. You don't want a single jet stream of water because this will take you a long time to complete the job. I usually like to break the area down into sections and work one area at a time, if you look at the entire job it may seem overwhelming but it’s not as hard as it looks. If you have areas that have a lot of mildew and mold, I recommend using a product called Krud Kutter; it is a non toxic environmentally friendly product. It won't kill your plants or hurt your animals, here's the link http://www.krudkutter.com/ to see what the product looks like, it is sold at Home Depot or Lowes.
Good luck with your pressure washing project and keep checking back for more handy man tips.

Saturday, January 22, 2011

Painting straight Lines

Every time I complete a painting job I always have the customers who say "wow that's an amazing job, how did you get the lines so straight?" I always tell them a lot of tape and patience. It is no secret that taping a paint job will help you in the long run, but a lot of people find that tape is expensive and time consuming. I have found in my years of work that it pays off to be patient and to buy good tape, I recommend using the green Frog Tape which is the only tape on the market with paint block technology that forms a barrier at the edge of the tape so you have no seepage into the tapes off area. Frog Tape is located at most of your hardware stores and you can visit their link http://www.frogtape.com/ to find a retailer near you.

When painting a room it is very important to tape along all the edges that you do not want to paint to touch. Make sure that you tape along windows, ceilings, doors, trim, and anywhere that you do not want the new color to touch. Although they sell the tape in many different sizes from about 1/2" to 1 1/2", I have found that the 1/2" tape works fine for most applications unless you are a very sloppy painter and need the wider tape but you will pay about double the price for the 1 1/2" tape. I posted some pictures that show when I painted my babies nursery, I used a lot of tape and it took a lot of patience but the end result was magnificent. I hope you enjoy, please post any questions you may have and I look forward to helping you with future projects. 


Handy work made easy

Hello my name is Fabian and I own a small handyman business called All Services. I found that throughout the years of working in construction many people believe that they are incapable of completing even the simplest task or feel that if they do it they won't be able to complete the job correctly. It can be as simple as changing out a faucet, painting a room, or even replacing a blown fuse in an air compressor. Some people just don't feel that they are capable to do a good job. My blog is going to help the everyday person gain confidence in their ability to do repairs around the house without having to pay the high cost for a "professional" to come out and do it for you.

Many people believe that when they hire a professional company to come out and do work that the person that completes the job has many years in training and will do it better than if they were to try themselves. The reality of the situation is that many employers hire employees with no knowledge in the field they are working in and teach them with on the job training, this means that they using your home as a training field. This blog will help you understand the basic components to completing handy work around the house. Although you will find projects that you must call a professional in, you will learn many great tricks of the trade by constantly checking in and interacting with my blog.